

This project combines the visual appeal of an ombre palette with the added texture and delight of disc bead accents. We’ll also explore an easy way to attach clasps to beadwork that can be applied to a variety of stitches.
Materials:
11/o seed beads in 6 colors
4 or more 6-8 mm disc beads
4 or more flat heishi beads or 8/o seed beads
Beading thread
A button or toggle (beaded or purchased)
To make an ombre herringbone cuff:
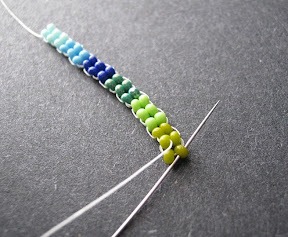
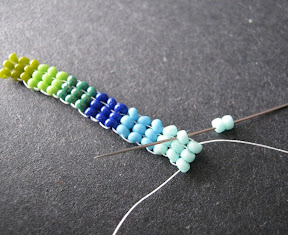
Start by arranging your seed bead colors from dark to light, or warm to cool. You can use 6 different shades of one color, or blend from one color to another. Try placing your bead packages in different positions until you get a pattern that is has a pleasing ombre look.

I like to start herringbone weave with a two-bead ladder, but you can also start with a single-bead ladder, or use the Ndebele technique. Check out the Twisted Tubular Herringbone Tutorial for full instructions on making a two-bead ladder.
Begin with 3 columns of each color in your chosen pattern, so that you have 18 columns in all. Step up to begin the first row of herringbone weave: stitch up through the bead next to where your thread is exiting, and up through the last bead in the top of the ladder.

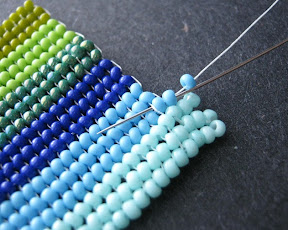
Pick up two seed beads - making sure that they match the first and second columns below - and stitch down into the first bead next to where you thread is exiting. Pull snug so that the beads lock into place side-by-side. Stitch up through the next bead in the row below and pull tight.
Continue adding two beads at a time, matching them to the pattern, until you reach the end of the row. Remember to step up through the following base bead at the end of each stitch. You can work in whichever direction is most comfortable for you.
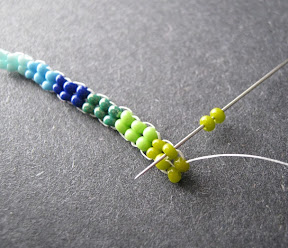

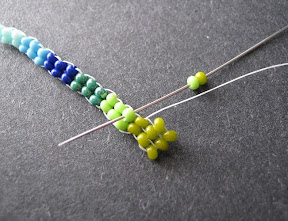
After adding the final bead pair, pull the thread snug, and then step up to start the next row: Stitch up through the bead next to the one that your thread is exiting, then up through the last bead added in the previous row. Pull tight, and flip the beadwork over.
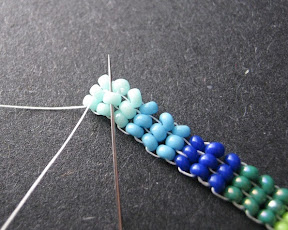

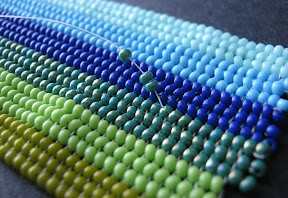
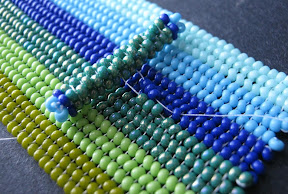
Continue adding rows of herringbone weave until the beadwork reaches the desired length, adding new thread as needed. You’ll need to allow a bit of length for the clasp - about half an inch or 1.5 cm. The clasp will overlap, so the final length is adjustable.
Once the final row is added, you can cinch up the beadwork so that both ends match: stitch a dummy row by following the herringbone thread path, but without picking up any beads. Step up through the second column from the end, and stitch up and down the top two rows to connect the remaining columns together. There should now be threads between each of the beads along the edge. Weave in your threads and trim.


Add the bracelet clasp:
Secure a new length of thread in the beadwork, near one end. (If desired, add straight fringes to the edge of the beadwork using two or more beads of matching colors.) Exit from the 8th column, and pick up enough seed beads to form a loop that will fit your clasp. Stitch down into the beadwork through the 11th column and pull snug.
Retrace the thread path through the seed bead loop at least once more to strengthen. Continue adding fringes to the edge is desired, then weave in your thread and trim.
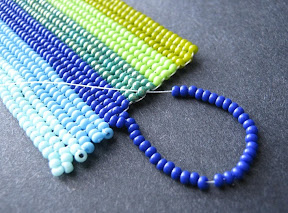
Secure a new length of thread at the opposite end. Test the length of the bracelet, and determine where you would like the second half of your clasp to rest. Count back 3 beads, and exit from one of the center 2 columns at this point.
Pick up 3 matching seed beads, your clasp, and 3 beads to match the corresponding column in the cuff. Stitch into the beadwork, then retrace the thread path at least once more to secure the clasp. Add fringes to this side of the cuff, then weave in your thread and trim.
Embellish the cuff:
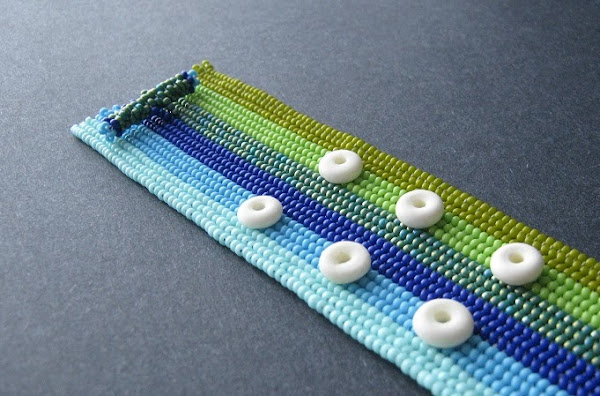
Arrange your disc beads on the cuff in a pattern you like. Take a picture or make a quick sketch if necessary. You can also add embellishments freeform for an organic look.
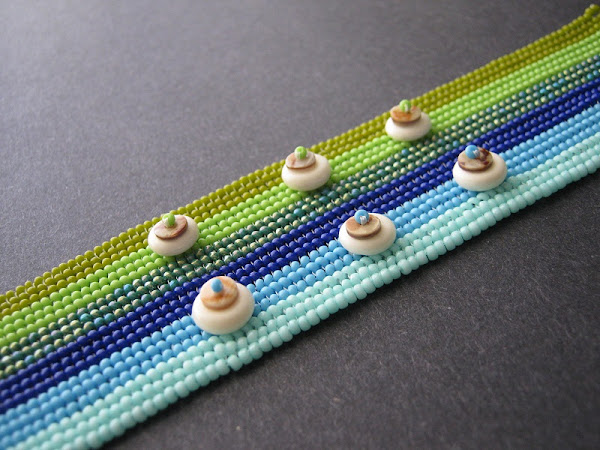
Secure a new length of thread near the point where you would like to add the first disc. Make sure that you are working from the same side as your button or toggle, so that the accents will face out! Weave through the beadwork and exit from your start point. Pick up one disc bead, one heishi or 8/o bead, and one seed bead to match the closest row in the cuff.
Skipping the seed bead, pass through the larger two beads, and through the cuff below. Pull snug, making sure that there is no slack thread in the stack of accent beads. Pass through 2 seed beads from the underside of the beadwork, then two beads in an adjoining row - follow the herringbone thread path.


Pass the needle between the beads, being careful not to snag any threads, and pass up through your accents. Stitch through the top seed bead, then back through the accents and into the beadwork again. Continue reinforcing the stitch until the accent beads are secure, then weave through the cuff until you’ve reached the next area where you would like to place a disc
Continue adding your accents, adding thread as needed. Weave in your threads, and you’re done!
There are so many fun color and pattern possibilities for this project. If you make a variation, share it on Facebook - I’d love to see what you come up with!
Copyright 2013 Inspirational Beading
Subscribe to Inspirational Beading
Get inspired on Facebook and Google+


Thanks for sharing this lovely tutorial . Will post the pictures on facebook soon !
ReplyDeleteGracias por el tutorial, es precioso...
ReplyDeleteI love this tutorial thank-you!! I have couple of questions, first: you say 11/0 seed beads, but in your pictures, the beads look larger than 11/0. Is that because you zoom in on the camera?? Also, where do you buy you beads from?? I think that is it, thanks again for all of your tutorials!!
ReplyDeleteThanks, Zoe! They are indeed size 11/o zoomed in. I purchase beads from a variety of online shops, depending on what my needs are. My top favorites are FireMountainGems.com and ArtBeads.com. If you click on "wishlist" in the tag cloud at the bottom of the page, you can find some of my other favorite places to shop and to browse. Happy beading!
Delete